Brady: How to Select a Wire Marker
Manufacturer guidance on marker type, cable size and installation timing.
View detailsResource Guide
The same wire ID can look clear on a flat proof and disappear around a cable. Start with actual outside diameter, viewing angle and installation stage.
Published 2026-09-28
Digital proof before production. Material and adhesive options are discussed according to your application requirements.
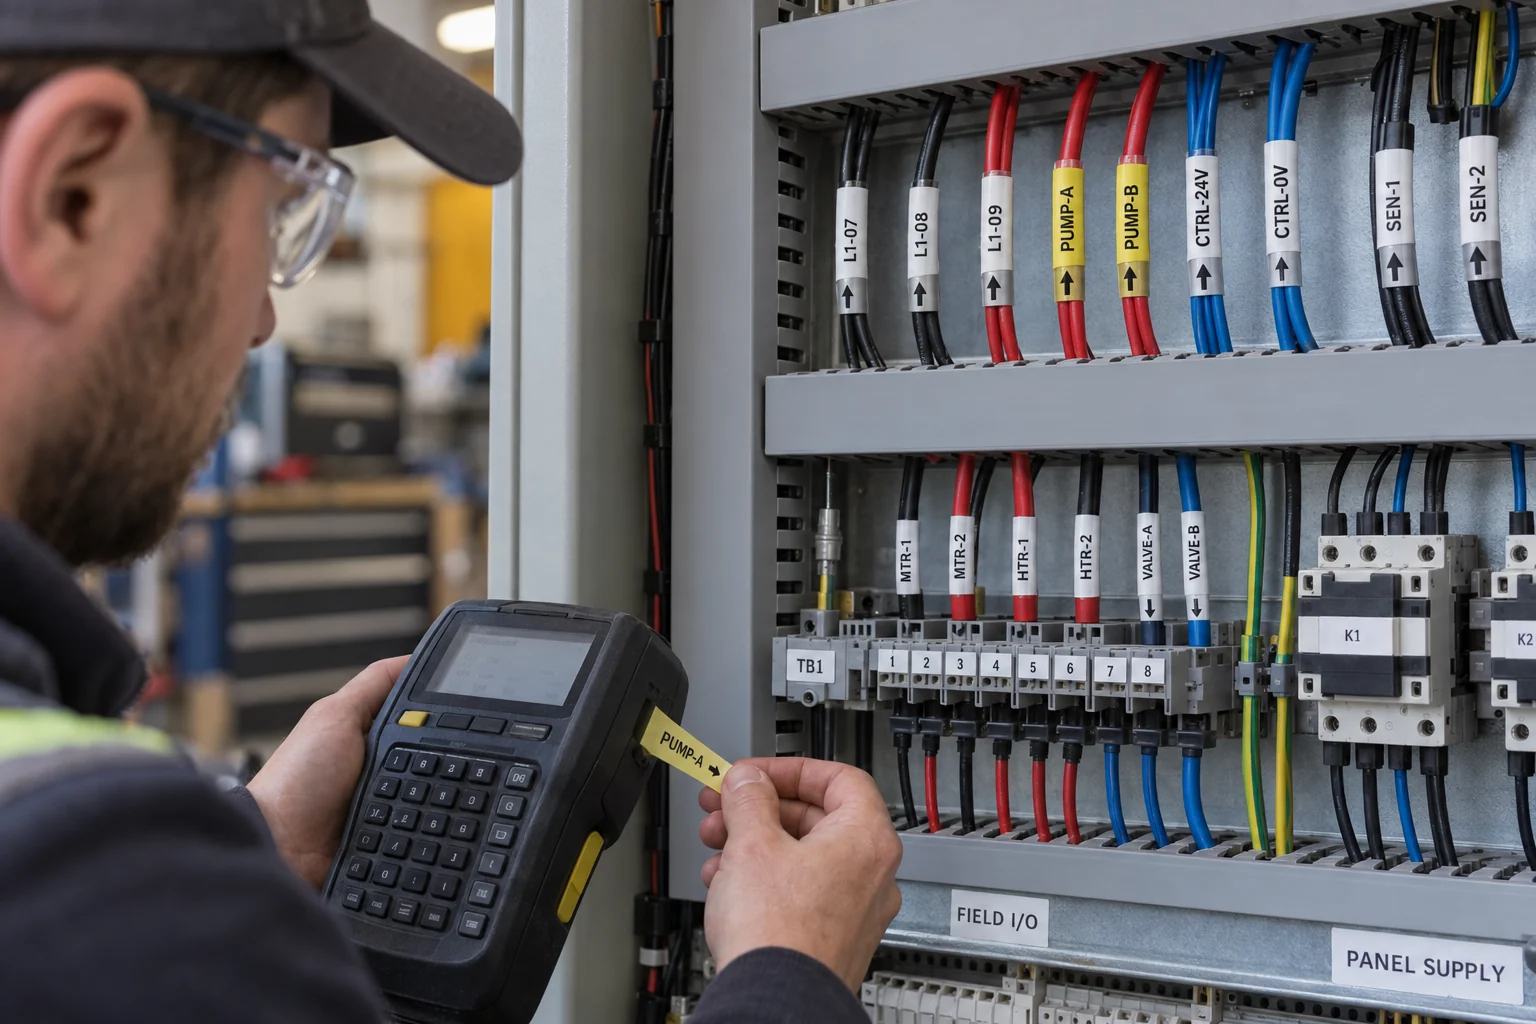
For a wrap marker, the cable outside diameter determines how much label length wraps around and how much print area stays visible. A self-laminating marker adds a clear tail over the printed area; a sleeve has a different installation sequence. Brady advises choosing marker type and dimensions around cable size and whether identification happens before or after termination. Use the manufacturer sizing guidance for the exact construction, then test it on the actual wire.
Imagine an assembler holding a neat proof reading PUMP-A on a white strip. Once wrapped, half the text faces the cabinet wall and the tiny direction arrow lands beneath an overlap. This is an illustrative scenario, not a measured failure. A wider print panel or repeated ID may solve visibility; a bigger font without enough wrap length may not. Ask the technician which side they can actually see during maintenance.
A sleeve may need to go on before the cable is terminated; a wrap or flag-style label may be possible later. A small wire, thick jacket and tightly packed terminal block create different clearance problems. The right choice depends on bend radius, wire bundle density, temperature, cleaning exposure and whether the ID must remain legible after rewiring. Do not extrapolate durability from a generic material name alone; request construction-specific information and sample review.
Put the functional wire ID first. Add circuit, source/destination or direction only if the print area remains legible. If a code is required, verify that the actual scanner reaches the installed wire; a code on the proof sheet is not enough. Assign one owner for the source data, and include the wire-list revision in the print brief. A cable marked L1-07 while the drawing says L1-70 turns a small label into a troubleshooting problem.
Send cable diameter range, jacket material, wire color, intended label length, print list, quantity per ID and photographs of the finished panel. Ask whether the proposed stock and print system suit the environment. Review a sample on the smallest and largest wires, then check the overlap, terminal clearance and reading direction. That exercise is more informative than ordering one universal marker size for every cable in the cabinet.
FAQ
Not reliably. Measure the cable outside-diameter range and test the exact marker on the smallest and largest installed wires.
Only if the code stays readable and the maintenance workflow actually uses it. A clear human-readable wire ID remains important.